In this guide, we’ll cover the abilities and strategies suggested for the bosses included in WotLK Trial of the Crusader. Buckle up and follow us!
Northrend Beasts
The Beasts of Northrend are the first three boss encounters in Trial of the Crusader. This fight can be separated into three phases by seperating them by bosses:
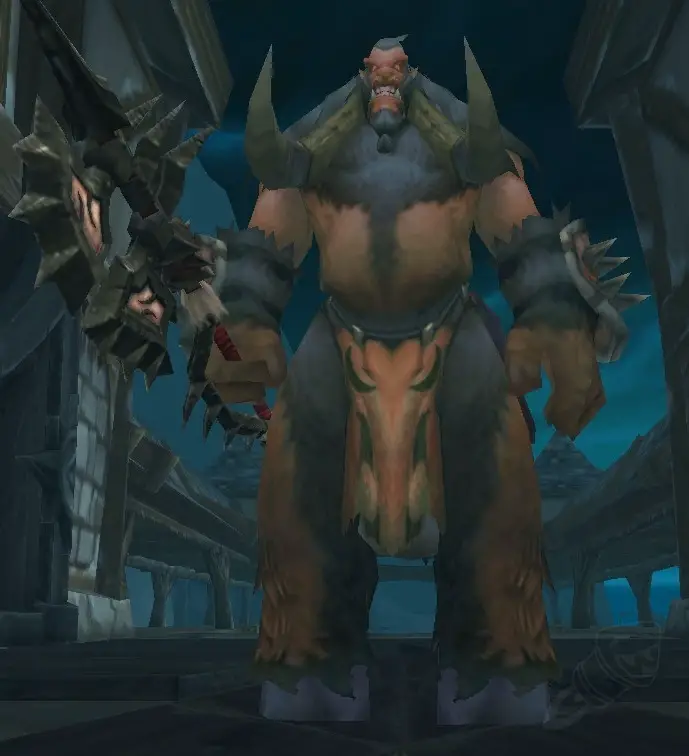
- Gormok (Magnataur)
- Acidmaw and Dreadscale (Jormungar)
- Icehowl (Yeti)
Phase 1 – Gormok:
Gormok basically has two different abilities:
- Staggering Stomp: Does a Staggering Stomp that deals physical damage to all enemies within 15 yards and interrupts spell casting for 8 seconds
- Impale: Inflicts 100% (Heroic: 150%) of weapon damage to an enemy and causes it to bleed, dealing damage every 2 seconds for 30 seconds. Cast every 10 seconds and stacks.
- Additionally, Snobold Vassals leap from his back for every 20% health loss he suffers (up to a total of 4).
For strategies, it is recommended to go for the good old tank and spank with a few changes. The two tanks should taunt off each other to prevent the bleeding effect to stack up too high. Also, ranged and healers should spread out to prevent the interrupt from staggering stomp by out ranging it.
The tanks should taunt each other off at around 3 stacks, best would be two stacks. If done correctly, they can keep the stacks from ever getting above 2. While it is possible to heal against 8 stacks, it is not recommended as it makes the start of Phase 2 very difficult.
For casters, it is crucial to stay away from the Snobold Vassals. While they are not particularly dangerous, they can keep a caster from ever casting a spell by interrupting them.
Phase 2 – Acidmaw and Dreadscale

They each have three different abilities, gaining extra effects while rooted. They are pretty similar and only differ in the damage type. While Acidmaw deals nature damage, Dreadscale deals mainly fire damage and a bit of physical. The only real difference in their abilities is the third ability, which is AoE. Acidmaw releases a cloud of poison lasting for a set time, while Dreadscale sweeps around himself, knocking enemies back withing 15 yards.
Apart from their AoE attack, they both pack a melee attack gaining range while stationary, and a ranged attack. They switch between being mobile and stationary.
For strategies, it is recommended to split apart and keep as much distance to other players and the worms, as Acidmaws special effect, Paralytic Toxin, applies to all players centered in a 10 yard radius around the initially targeted player.
It is key to keep in mind the interaction between Paralytic Toxin and Dreadscales effect, Burning Pile. While Burning Pile simply falls off after time, players with Paralytic Toxin need to get it removed by getting close to a player affected by Burning Pile and getting one tick of fire damage.
We suggest you to kill Acidmaw first to get rid of Paralytic Toxin as fast as possible. But keep in mind that, once one of the worms is killed, the other one gets enraged, dealing more damage (at least 50%).
Phase 3 – Icehowl
Icehowl comes packed with 5 abilities:
- Arctic Breath: Unleashes an icy breath that freezes targets in a cone and dealing frost damage over time
- Ferocious Butt: Headbutts an enemy, dealing physical damage and stunning the target for 3 seconds
- Massive Crash: Leaps into the air and crashes down, dealing high amounts of physical damage to all enemies, stunning them and knocking them back
- Whirl: Whirls around, dealing physical damage and knocking the targets back
- Frothing Rage: Increases attack speed and physical damage for 15 seconds

It is crucial to keep an eye out for Ferocious Butt, as the target is selected randomly. He moves to the center of the room and turns to the selected raid member. He starts taking a few steps back, giving everyone a speed buff, charging to the target’s initial position after 2 seconds.
Other than that, this fight shouldn’t be a huge problem. Healers should watch out for the freezing cone and melees should stay at max range to prevent his periodic knockbacks.
Lord Jaraxxus

Lord Jaraxxus is your second encounter after the Northrend Beasts, but is definitely less difficult. In theory, his spells sound intimidating, but pretty weak compared to his predecessors. Especially tanks should have no issue sustaining his damage.
He has a total of 6 different Spells:
- Fel Fireball: Jaraxxus will cast this every 10 seconds, dealing moderate fire damage and leaving damage over time. This spell can be interrupted, resulting in him defaulting to weak melee attacks
- Fel Lightning: Jaraxxus casts this on a random player around every 10 seconds, dealing fire or nature damage (depending on the lower resistance) and bouncing on up to 5 more targets if they are close enough together
- Legion Flame: Casts every 30 seconds, burning a random player and leaving behind a patch of fire, damaging other raid members in range
- Incinerate Flesh: Casts every 25 seconds on a random raid member, reducing their damage dealt by 50% and absorbing healing received. It can only be removed by exceeding the healing absorbed (40k in 25-man, 85k in heroic)
- Nether Power: Lord Jaraxxus buffs himself with 10 stacks of Nether Power roughly every 45 seconds, increasing his magic damage dealt by 20% per Stack for 30 seconds
This fight does not need a specific strategie, instead focus on keeping his attacks on laughable low damage. Fel Fireball should be interrupted every time, ranged units should spread apart to prevent bouncing of Fel Lightning and healers should focus on removing Incinerate Flesh if possible, as it evolves to Burning Inferno after 15 seconds if not healed. This deals an absurd amount of damage over time and might be the only challenge for your raid.
Other than that, just make sure to not kill your allies while being inflicted with Legion Flame. If you have a mage in your group, be sure to Spellsteal the Nether Power to remove the buff from Jaraxxus. If you have no mage in your group, be sure to quickly Purge the buff whenever he casts it.
Faction Champions
This encounter differs a lot from the previous ones. This time, you’ll have to fight 6/10 (depending on party size) quasi-player NPCs, which act like a solid arena team. That means, that some PvP rules apply, like the behaviour of crowd controls, healing tactics as well as the usage of cc abilities against you and your raid members.
As usual for arena fights, it is recommended to focus down damage targets and CC’ing the other combatants. Due to the fast-paced nature of the fight, players are forced to make quick decisions, leading to potential mistakes.
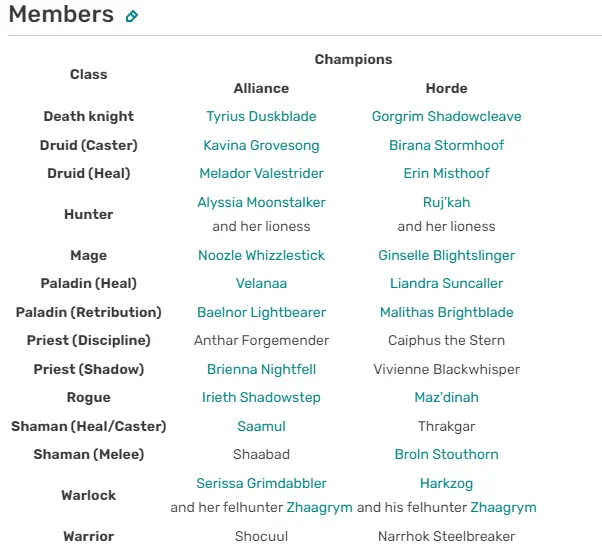
The biggest advantage in this encounter, in contrast to arena matches is, that all enemies and their classes are known prior to entering the fight. This could be used to e.g. create some macros, targeting specific roles by their names, making it a lot easier to apply crowd control to the right target. However, because of diminishing returns, it is suggested to switch targets regularly.
With every dead target, the fight gets a lot easier and more manageable. Keep in mind that all targets are interruptible in their spells.
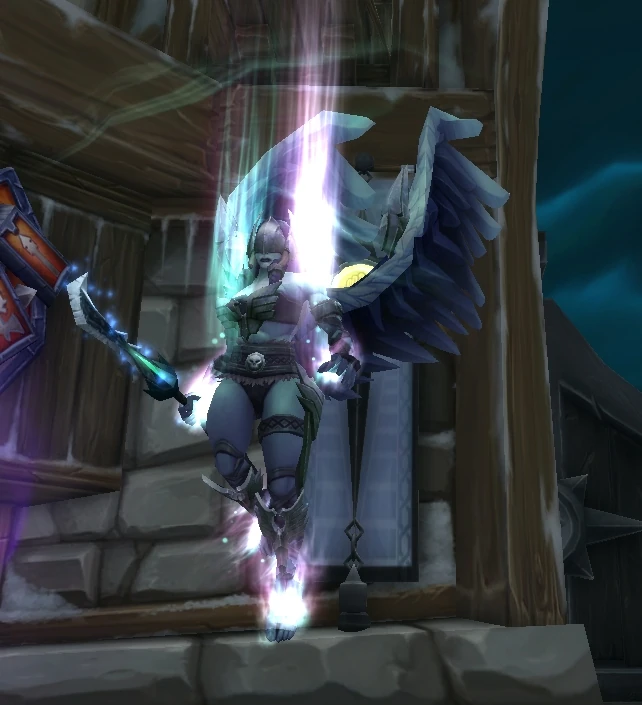
Twin Valkyr
This bossfight consists of two bosses, Eydis Darkbane and Fjola Lightbane, as well as a unique mechanic. Throughout the encounter, there will be orbs floating around the room. White orbs and black orbs. At the entrance of the room, there will be a font, allowing you to choose either of the two. Picking one type grants you a debuff, gaining energy when hitting the respective orbs or damaging you when hitting the other ones. Upon reaching 100 Stacks, your damage for one of the two bosses while increase by 100%. Picking the dark orbs empowers you against Fjola, and picking the light orbs against Eydis respectively.
Additionally to heaving a skill set each, they share 3 abilities:
- Twins Pact: One of the twins will try to heal the other one. This 15 second cast must be interrupted
- Power of the Twins: While one casts the heal, the other one gains 20% more damage and increased attack speed for each successful melee attack until Twins Pact is interrupted
- Twin Spike: One of the twins will attack their target and apply a debuff, increasing their damage taken by 20%
Their abilities are the same, only differing in the type of damage they deal. Eydis deals shadow damage, while Fjola deals holy damage:
- Shield of Darkness/Lights: Grants a massive shield and prevents her from getting interrupted
- Dark/Light Vortex: Channels a vortex dealing shadow/holy damage every second
- Surge of Darkness/Light: Pulses shadow/holy damage to every raid member not having the darkness/light essence debuff
- Touch of Darkness/Light: Selects a random player with light/dark essence debuff and apply the Touch, receiving massive shadow/holy damage to them and anyone near them not having the debuff. This can only be removed by clicking the appropriate font to switch debuffs. This mechanic is only present in the heroic mode.
As for strategy, it is recommended to head in with two tanks, one for each twin. One way of completing this fight is designating 4-5 members of your raid to collect the light orbs. These should be mobile classes, obviously, as they will be moving around a lot. The remainder of the raid should pick the dark orbs and focus on Fjola first.
Keep in mind that every 45 seconds, the twins will perform their special abilities, which is either Dark/Light Vortex or Twins Pact. If Twins Pact is the choice, the entire raid should switch to the corresponding font to make sure to wear down the shield of the shielded twin as quickly as possible.
If Vortex is cast, the entire raid should switch to the corresponding font to prevent massive damage.
Anub’arak Boss Guide
Anub’arak is the final boss of the Trial of the Crusader. Since your last encounter with this beast in Azjol-Nerub it gained some powers thanks to the Lich Kings power of reanimation. It comes with 8 different abilities based on the current phase:
Phase 1 – Ground Phase

- Freezing Slash: Inflicts 25% Froststrike weapon damage (frost or physical, depending on resistance) and freezes them for 3 seconds
- Penetrating Cold: Cast on five random members, dealing frost damage every 3 seconds for 18 seconds. Is repeated to another five players as soon as it drops off
- Submerge: Burrows into the ground and switches to Phase 2
Phase 2 – Submerged Phase
- Pursued by Anub’arak: Anub’arak is pursuing you
- Pursuing Spikes: Fires a spike through the floor, hitting all targets withing range, dealing damage and knocking them up. This ignores armor.
- Impale: When his target is reached, he fires a spike through the floor in front of him dealing massive damage to anyone in range, ignoring armor (except Permafrost)
- Summon Scarab: A swarm of scarabs emerges from the ground
Phase 3 – Leeching Swarm
- Leeching Swarm: At 30% HP, unleashes a swarm of insects that attacks the players, leeching 10% of the targets current health every second, healing Anub’arak
For Strategies, it is suggested to designate one ranged DPS to shoot down the frost orbs to form Permafrost on the floor. Nerubian Burrowers will spawn in Phase 1, stacking Expose Armor on their tanks, increasing physical damage taken. These need to be tanked on Permafrost, else they’ll burrow and heal up to full.
In Phase 2, Anub’arak while burrow every 90 seconds and starts chasing a random target, trying to impale them and spike everyone on his way. Standing on Permafrost prevents him from impaling you, resulting in him switching targets and removing the Permafrost.
Swarm Scarabs keep spawning quickly, having low hp but starting with threat on a random player. They should be kited, optimally by dragging them above Permafrost to slow them down.
After around 60 seconds, Anub’arak will resurface and switch back to Phase 1.
As soon as he hits Phase 3, you should kill him as quickly as possible, as you won’t last long under the effects of Leeching Swarm. It is advised to not top off your raid members as a healer, rather keep them as low as possible to prevent excessive healing on Anub. Tanks should be topped off regardless of the phase. Anub’arak can be healed above 30% health, but the swarm will not be deactivated once activated.
